Pages

Showing posts with label All Grades. Show all posts

5.13.2013

ArtShow2013

ArtShow2013 was a huge success!


I don't even know where to start.

I like to have students pick their best work from the year to display at art show - but I don't have the room to keep portfolios for 500 or so kids and I don't like keep artwork instead of sending it home.  So, what I do is this:  When we have completed two projects I have the kids pick which one they did better on and send the other home.  We do this all year so that we always have something picked out for art show, but artwork also goes home. Often times students pick artwork that I don't feel is their best work - and if I ask them why they pick it, their choice is clear.  Students that pick a project that has an end product that is less than their best often pick those because of the process - which is just as important.

I love doing it this way because it creates a great variety of work for ArtShow - giving both parents and I a year review of what has been happening in the art room. 

When we get about a month out from art show we start finalizing projects, signing labels, double and triple checking class lists.  It takes about a month to gather all the projects because kids are sick, at Dr. appointments, on vacation, and any other reason for missing art.

Once projects are finalized I added signed labels and QR codes to each and every project.

Yes QR codes on each project.  Why? Other than because I'm crazy - I am always trying to advocate for my program, reaching out to parents in anyway possible.  Each QR code leads parents to this blog, and specifically to the blog post about that particular project.  I could have made it easier and put the same generic QR code on each project, but that seemed pointless.  My goal was, and is, to communicate to parents about the lessons behind the projects - so to make it easy on them each QR code was specialized.

QR codes are EASY to make.  Goggle "QR code generator" and you'll get LOTS of hits and websites to make the codes for free.  Put in your desired URL (or other info), generate the QR code, download - simple!

Now, I tried to make this as easy as possible on myself and opened Microsoft Word, downloaded a return address label template, imported the QR code - copy and pasted putting two QR codes on each label.  I did this for either a full sheet or half a sheet depending on how many I thought I would need.

Then I sat on the floor in my house, cut and stuck QR codes to each corresponding project.  My cat Phineas was so helpful in this process!

The day arrived to set up ArtShow2013.  This year I got to be in the Cafetorium, because 2nd grade production was done earlier in the year.  I LOVED being in the Cafetorium.  I had WAY more room.  I spent the day putting up grids, clipping artwork, setting out clay pieces on their own labels.

It looked AWESOME.

After everything was set out I then needed to set up my light graffiti booth and my stop motion animation area.  I asked two teachers with teenage daughters if they would be willing to volunteer sometime to art show.  They both agreed and I was thrilled!  I had one daughter on the stage, in the dark with an iPad, flashlights, ghost light, and an iPad app called, "Slow Shutter".  Here families could make light graffiti together.  When I told students there was light graffiti on the stage - their eyes got wide and immediately they were dragging their families to the stage.  I used this app instead of a camera because it allowed families to e-mail themselves the photo right after it was made.  This way I didn't have to try and figure out which went with what family.

I also had a table in the corner set up with Stop Motion animation.  Students were introduced to it the week of ArtShow and were eager to share with their parents how it worked.  Families worked together through out the night to create the video below. 


11.30.2012

My Mind is Blown!

I have to be honest - I feel like my head might explode, in a good way.

So yesterday I read the book "The Artistic Edge" which is aimed at talking about 7 skills kids can learn through the arts to be successful in life.  While this book isn't exactly what I thought it was going to be - it brought me to "Artful Thinking" which then took me to "Visual Thinking" - something my Principal has introduced to my Elementary School of the Arts.

I feel like singing "it's a small world after all".  I have decided that no only have I not given enough effort into understanding 'Visual Thinking' - but that I may have found something that will truly impact my teaching and hopefully my students.

I am personally sick of having the word 'assessment' shoved in my face.  I agree that we need to always assess things:  How is this lesson going? Are the kids understanding? Are they making connections? Did I give them too much information/not enough? Did a create a lesson that has higher level thinking?  Who is confused?  Who has it?  -- These are all assessments that happen while I am teaching a lesson and conferencing with kids as I walk around.  I really despise having to write stuff like this down or create less open assignments so that they can fit into an 'assessment' to show growth.  Kids don't 'show' growth in a concrete way in art -- which is EXACTLY what Visual Thinking, Artful Thinking, and The Artistic Edge talk about in kind of a round about fashion.

These programs/studies/books all STRESS that kids learn HOW to think, not WHAT to think when they are involved in the Arts.  I have been saying for years on this site and to anyone that will listen that my job is not just finger painting and paper gluing -- kids actually learn VALUABLE skills when they come to my room. They learn how to problem solve, critically think, reflect, ask for help, preserver - and so much more.

I am super excited about these programs/books, because I had no idea they were even out there.  Where have these been all my years of teaching?  I wrote a post a few months back how I felt stuck in my own learning - that any type of conference was too expensive and out of my budget -- but this, this I can do.   My building is learning it on a smaller scale and I am so excited to learn more about it that I can barely decide where to start!  I am overwhelmed with the information and studies and such that are out there!  WHO KNEW?!

It is also nice to see actual studies, papers, programs that are aimed at what I have always believed to be true - that yes, academics (math, reading, writing) are super important but it is also valuable to know HOW to think - just not WHAT to think.  Most kids in math learn what to think in math (a few who really get it and love it ask "how") - they learn the equations and plug in numbers.  In good art programs kids are given parameters and told to create something original. 

In The Artistic Edge - there is a section devoted to kids that have low self-esteem when it comes to academics.  It is easier to refuse to do math, than to try and ALWAYS be wrong - because there is a right and wrong answer.  I tried to be that kid, my mom and tutor wouldn't let me off the hook -- bless them.  In art the only 'right' and 'wrong' are if you followed the parameters -- otherwise every answer is correct.  It is easier and 'safer' for kids with low academic-esteem to try in art classes because there is a HUGE grey area where they can succeed and grow with their confidence.

AH!  I have so many more things running through my brain - like how arts help kids communicate (talked about in The Artistic Edge) how the arts can save kids (a stories in The Element, The Artistic Edge - and seen in a few of my own students) how the arts can teach life lessons - like asking for help.

So much information!  So much to learn!  My brain is going to get stretched here soon and it may not always feel great, but soon enough I will have some new ways to help my students grow as THINKERS!

Check out this List of Project Zero's Research Projects.
Making Thinking Visual - The Book


** I should state that it is the COMBINATION of these things that make me super excited.  The book "The Artistic Edge" is interesting, but I found nothing ground breaking it in.  I had hoped for more examples of how the arts help students learn the skills she talks about, but instead there is a lot of talk and then just - kids learn this in the arts, with little examples and of the examples given are mostly Theatre based.  I agree with her points and her message, but I was hoping for more of a book I could hand skeptics and say, "read this" - but it doesn't have that kind of 'aha' factor -- at least it didn't for me.


6.11.2012

Light Graffiti (Week Two) -- Whole School

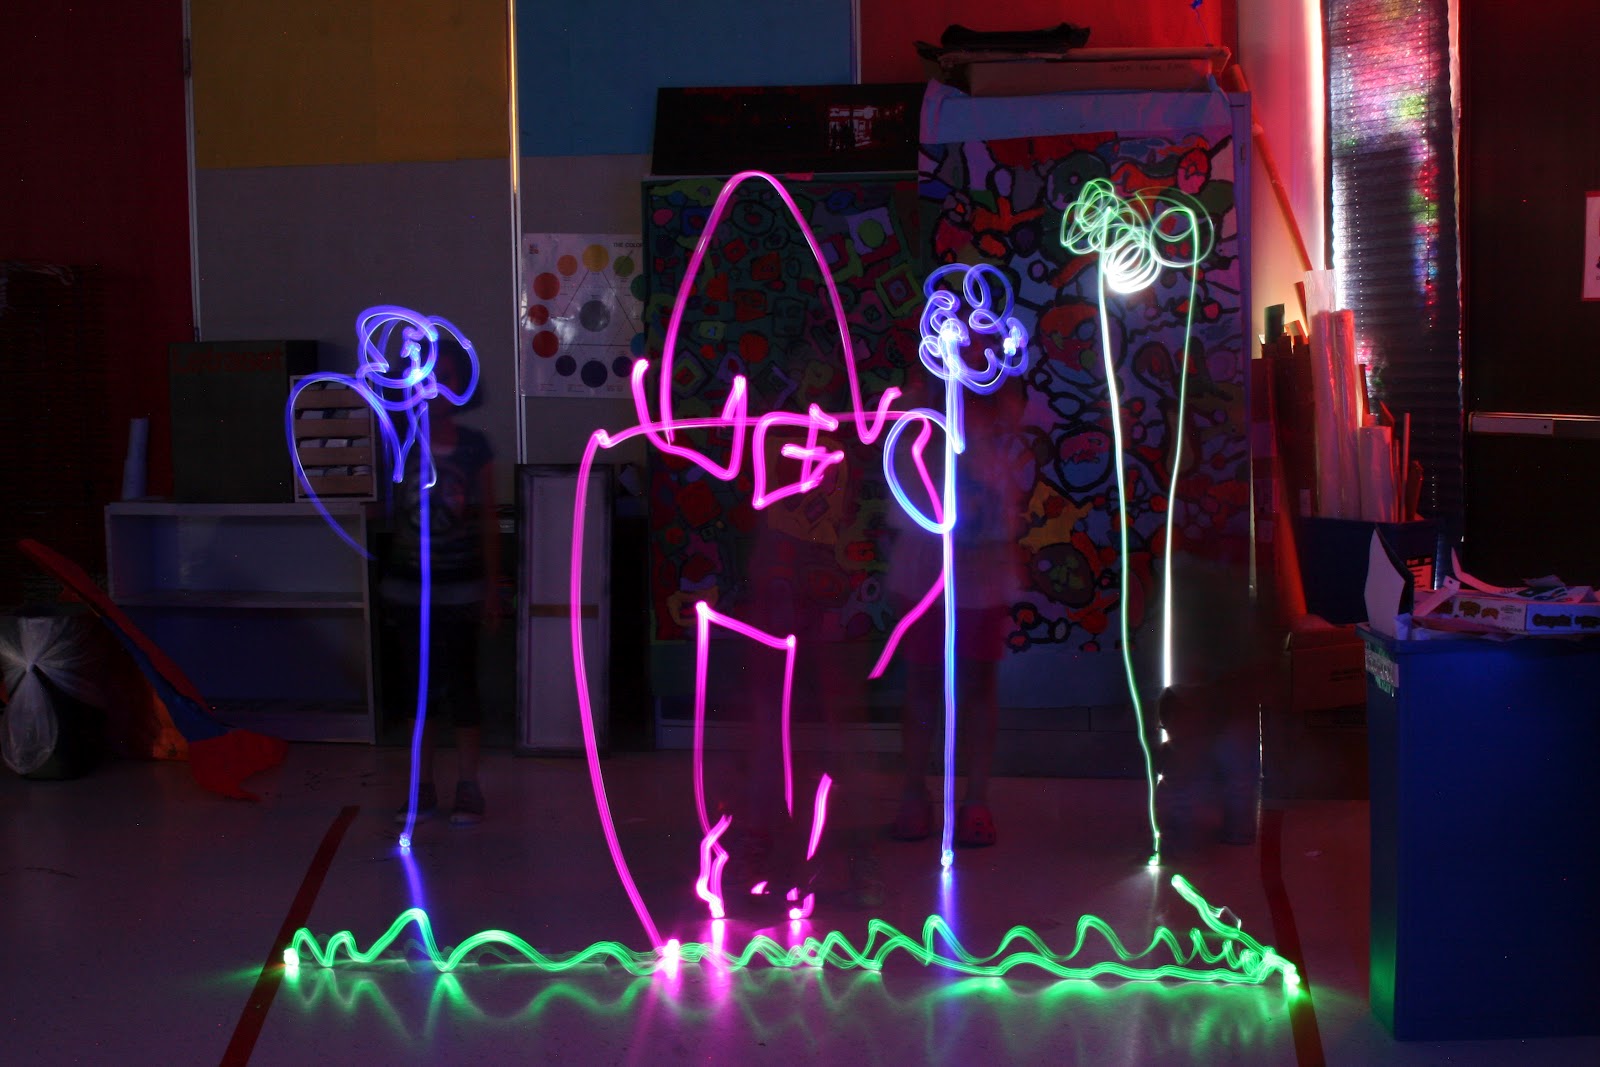
So, the second week of light graffiti is a less experimental and more deliberate.  Our goal the second week is to create recognizable pictures.  Students work in groups to create simple compositions based on a slip of paper they pull from a bucket -- it is harder than it seems.

So I do an example with a few volunteers from the class so that kids understand how it works.  I first ask my volunteers to each pull a strip of paper from a bucket.  In the bucket there are strips with words and a simple picture: grass, house, flower, tree, cloud, sun, and stars.  When we each have a strip of paper telling us what we are going to draw - we combine our images onto a piece of paper to make a picture.  I let each person draw their element on the paper and point out that no one is being bossy and telling people where to put each piece.


1st Try

2nd Try
Next  I show where to hand in the paper and return the slips.  Then I call my group to get their flashlights and get ready.

I help set up our picture by asking the class to help us figure out where to stand.  I ask them "Where should the grass be - front, back or middle?" - Most of the time they all agree with the front, but some classes need a little help figuring it out.  "Should the grass be drawn up in the air by my belly button?"  - No. "Where should the grass be?" -- On the floor.  "Okay, so now where should the flower go?" - Behind the grass.  "Where should the flower grow from?" - The grass/floor".  This process goes on till all our elements are in place.  Next, we take the picture.  When the picture is displayed on the projector we take a look and make adjustments to where we are standing, how fast we need to draw, covering our light when we are done, or perhaps getting a new light.  We then do a 2nd picture to try and improve.  Often times the 2nd picture is WAY better - though not always.  Below is a video of students doing their 2nd picture.


Next, the students break up into groups of about 5, pull their strips, draw their picture, hand in their picture and wait for their turn.  We go through the groups one at a time - making sure each group gets at least 2 pictures from the camera.

Most groups did a great job and exclaimed how much harder it was than they thought it would be.  


6.06.2012

Light Graffiti -- 2012 (week one)

As always, light graffiti has been a HUGE hit with my students the last two weeks.


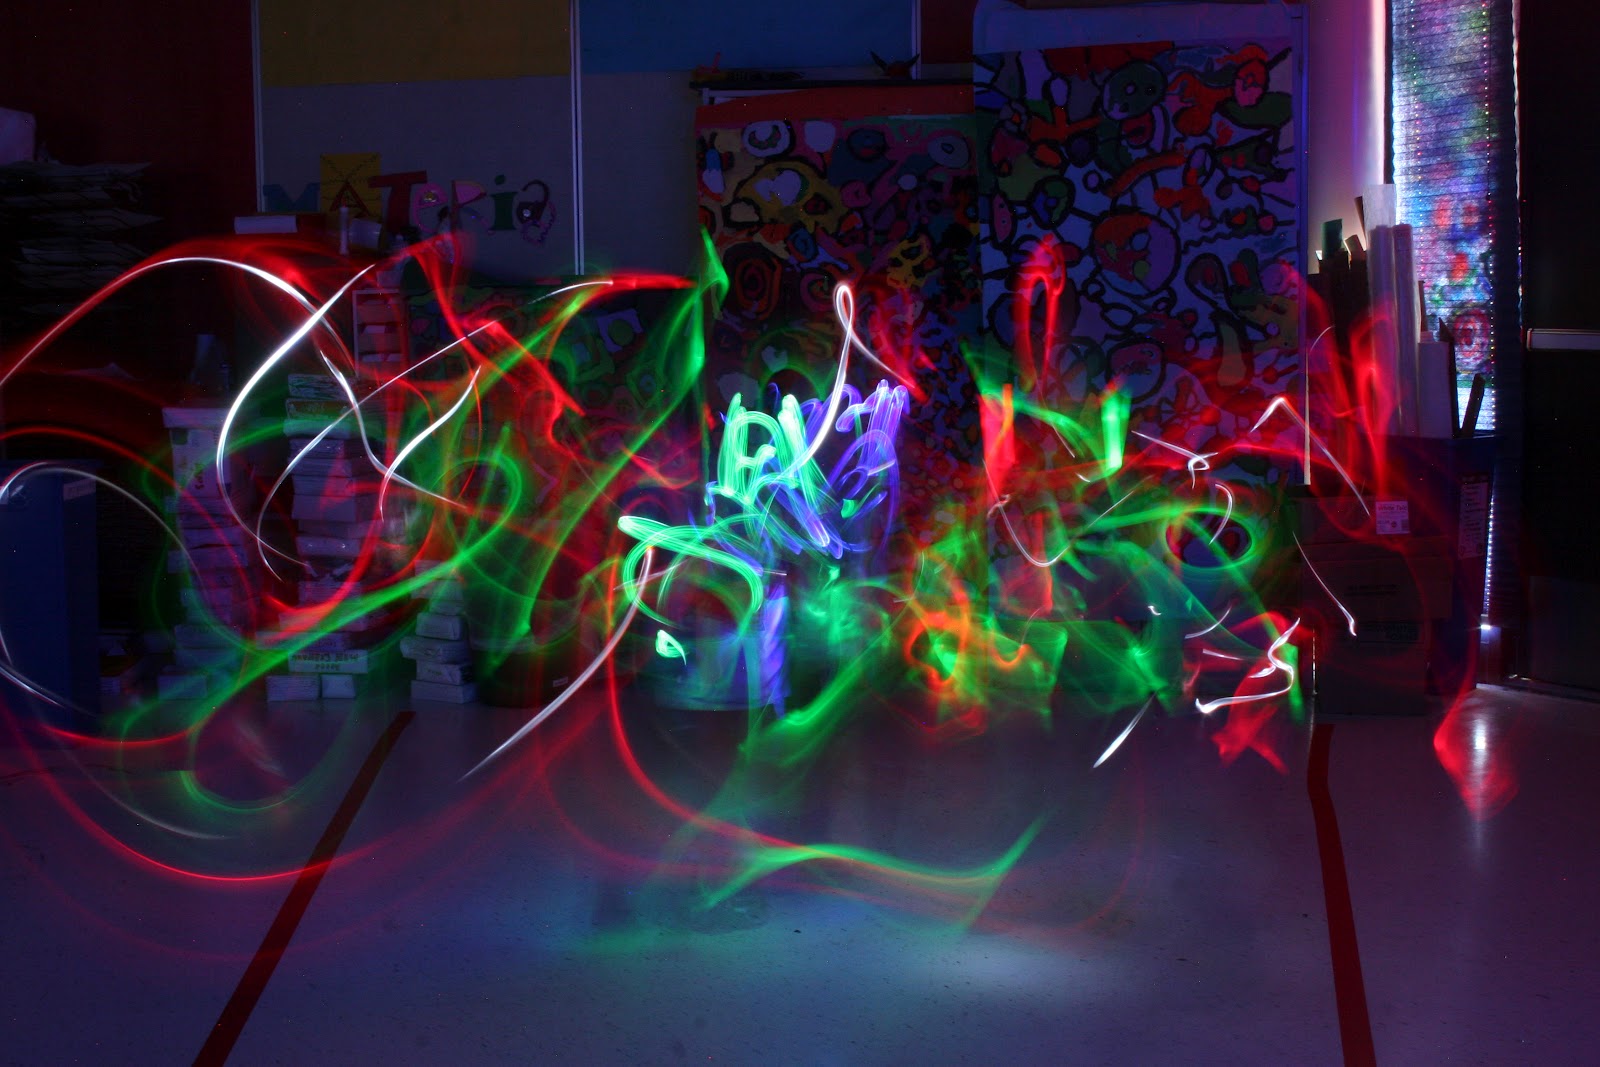
The first week I introduce Light Graffiti by asking the kids what they know about 'graffiti'.  Generally someone says that it is done with spray paint and that it is illegal.  I tell them that is true, but graffiti can be more than spray paint.  I explain that graffiti is making a permanent mark on a surface that you don't have permission to write on  - and yes it is illegal.  We briefly discuss that some art might look like graffiti but are really murals.  I explain that graffiti can be a mural when the artist is granted permission to do their art on a specific surface.


After discussing graffiti and murals I ask students why they think that LIGHT graffiti might be a popular alternative in the art community.  Some classes get it right away and other classes need a little push.  I will often emphasize the word LIGHT in my sentence again.  How do you think LIGHT graffiti would differ from normal graffiti and why might artists like the alternative?!  ::POP:: ::DING:: the hands shoot up all over the room.  Yes, yes, light won't make any permanent marks on the surface - so it isn't illegal!! 


Next we watch the following two videos that I found on youtube.  I explain that the first one is a commercial and that we will watch it twice -- once for fun and the second time to look for the people creating the light graffiti.  The second video is a tutorial that explains what we need to make our own light graffiti.

1st Video:

2nd Video:


After the videos the students tell me what we need for the day:  colored lights, camera, tripod, and setting settings.  (If there is time at the end of class I explain and show the students the shutter/shutter speed).


Next, I explain that I will call up two students at a time to pick out one or two colored flashlights.  When they are ready they will step inside of the polygon I taped on the floor (yes we really do talk about what a polygon is).  Then I will say "Ready, Set, Go" when I say go they can start moving around for their picture.  When their picture is over I will say something like, "Let's check it out" or "Lets see what it looks like".  The picture is then projected through our projector on the board!  I go on to explain that they will get another turn right away so stay where they are.  I want the students to go twice in a row because they learn SO MUCH from that first picture, that I want to give them a chance to try it again once they get the hang of it.  At this point I break and ask if there are questions - there are generally very few.


Then last, but not least, I ask the class if I have only two kids doing the light graffiti what is everyone else busy doing?!  "Watching" they all say.  I really stress that they need to ACTIVELY watch - as they will learn from each other.  It is safe to say that 99% of my students had never done this before and if they watch each other they get ideas and start to build off of other students movements.  It is really very fascinating.  

Again, I ask for questions - if none we get moving!

Here is a video of some kiddos making their first light graffiti:


Enjoy!  This is a blast at the end of the year!

5.18.2012

Origami -- Paper Airplanes

I found these instructions on the internet - if these belong to you or to a book, I apologize I found them without any credit.

I picked these varieties because they were simple enough most students could work their way through them, and the instructions are all on one sheet!


End of the Year Lessons -- Whole School

The end of the year is a tricky time to teach -- the kids are antsy, my patience is generally smaller, it's SO nice out, and the kids miss random classes due to field trips and other events.

I design my last month of classes to highly engaging lessons that lean towards 'fun' while still having an educational component.  This way if I miss a class because they are on a field trip - I don't have to go back and teach the lesson they missed.  I also don't have a stack of papers at the end of the year for a student that missed the last week of school.

4/5 Weeks before End:
Clean out projects.  I spend this time passing back everything that I can find.  This year students 'doodled with Jim Henson' - we talked about how truly awesome Jim Henson is and how he 'doodled' all of his puppets/muppets.  The students then spent time creating their own characters -- students actually loved this more than I expected.  They really got into sharing their creations with people around them.  While they were busy 'doodling' I pass back any and all projects that got stored, put on display, mixed up in other classes.
 
3/4 Weeks before the End:
Origami Paper Airplanes.  Students ask all year to make paper airplanes - so we spend a day devoted to making them.
The rules:
- 3 papers total
- Decorate papers (keeps the kids honest about who's plane is who's)
- Grounded when indoors.
We spend class making airplanes based on prior knowledge and instructions.  We clean up early and either fly them in the room or, better yet, outdoors.


3/2  Weeks before the end: Light Graffiti.  I black out all the windows with black paper, find a tripod, digital SLR, cables to hook up to the tv and lots of flashlights/light emitting objects.  The first time we do this - students just experiment.  My lesson and links are here.

2/1 Weeks before the End:
Light Graffiti again.  This time I have paper with simple objects on them and groups make pictures.  Read here.

If we have one more week left we play art games, clean the room, art videos - generally I have some options and let the kids vote on what they would like to do.  The last week of school I rarely see every class - so it's kind of a relax week.


5.15.2012

Art Show - Whole School

Well, it came, it was great - and now it's over.  Art show was tonight and I can't believe how great it was!


I was stressing a little bit last night about how long it would take to set up, how many volunteers I would get, how the community would receive the show.  I teach art very differently than many art teachers I know - for me art is more about guided exploration, learning, problem solving -- truly creating.  I wasn't sure if the community would be looking for more 'glamorous' projects.  From the handful of parents that stopped to chat with me - it sounded well received -- not just the show, but the program I have started this year.  One parent told me her child likes coming to art because I listen to their ideas instead of just telling them what to do -- huh, I just figured that was part of teaching kids.

I had a bunch of volunteers that came in to help, teachers sent down volunteers from their rooms -- the art show grids where set in place, artwork was hung, tables were drug from all ends of the building, and clay was set out -- all in record time.  I was planning on having to crame it all in before the doors opened at 6:30.  Everything was done and completed by 2:30!  Thank you to all of my volunteers that helped!!!  I couldn't have done it without you.


Now for the self reflection on the show.

Things to do again:
- QR codes (there were a hit with parents, especially dads)
- Let kids pick their artwork for the show.
- Hand artwork by class, but not by grade.
- Mat artwork on black paper.
- Hang artwork with binder clips.
- Place grids around outside of gym, tables in the middle.
- E-mail for volunteers
- Ask families to take artwork when they leave for the evening.

Things to change for next year:
- Have students write names on smaller cards for clay.
- Have students write names on labels - stick to 2-D work.
- Buy table cloths for clay tables.
- Label clay by class like 2-D work.
- Take pictures during show.
- Post conversation starters around the area to encourage families to talk about projects.


If there are any other suggestions from parents/teachers out there - leave me a comment.

5.07.2012

Group Murals -- All Grades

I, again, saw a lesson on Pinterest that grabbed my attention.  An art teacher, Katie, had her students make group murals at the end of the year to hang on the bulletin boards right away in the fall for the next year.  I thought, 'WHOA! Why didn't I think of that?'  The idea and lesson seemed simple enough.

I had originally planned to do this lesson in a few weeks, but with Art Show and Open House next week - I thought we should do some for open house!  I immediately started to plan.

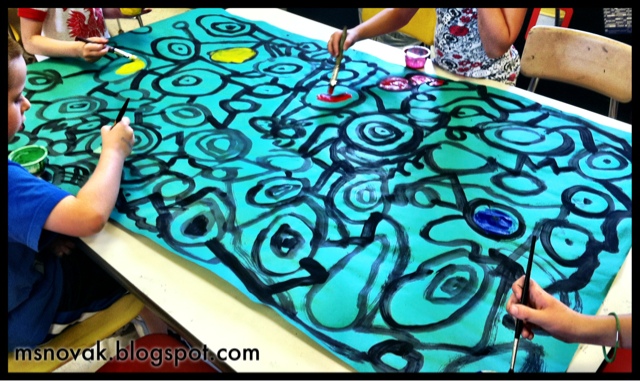
I went and ripped bulletin board paper in different colors, laid them on the tables, poured some black tempra and waited for my kinders to walk in.

There are two rules for the black painting:
1) Your shapes can't touch each other.
2) You can't paint over anyone's work.

I had my kindergarten kiddos draw lots and lots of circles at their tables.  When their paper seemed decently full I gave them the next instruction: connect the circles with different types of lines - leave big spaces between lines.

Amazingly, this took almost all class and my room was almost completely silent - it was weird.

I found random spots around the room for these to dry for the next few classes.

After lunch I pulled them back to the tables with a plan: Have 1st graders paint them.

I told the kids their rules:
1) You can't paint over anyone's work.
2) Stick to one color (you get what you get and you don't throw a fit!)
3) Spread out where you put your color.

I made sure to make each student have a different color of paint - even if it was simply making it a tint or a shade.

 The students started at their own tables painting in spots and shapes.  I set a timer for 2 minutes and when that time was up they rotated to the next table.  The timer helped keep their attention, because each table's mural was unique - but it also spread out all the colors.

Again, the students were focused and quiet while they painted.

I plan to make more of these this week with words like "MUSIC" "ART" and so forth.  I can't wait!


1.26.2012

Star Gallery

I have been wanting to make a small gallery at one of my schools since I was hired a couple months back (has it been that long already?!)  I wasn't sure where I wanted it or how I wanted it to look.

After I got the room mostly organized the way I needed/wanted it - I thought about making the gallery on one of the walls in my room.  The wall is huge and ALL the students would see it.  I decided I wasn't happy with this idea for a couple of reasons: 1) The 5th grade production backdrop has now been hung over that wall so we can start working on it. 2) All students would see it but no one else -- no parents, visitors, or staff would get to enjoy it.  So, all in all I decided to make one fo the front big bulletin boards, complete with track lighting, into the Star Gallery.   (The funky yellow star is our schools logo - it is based off of Matisse)

The gallery has somewhat amiable lighting (though there aren't enough lights for the board/far enough away - but it's better than nothing), good traffic, a sparkly gold frame and artwork already on it.  I have yet to complete the boarder - but in due time. 

I will be posting student work in/on the Gallery that goes above and beyond the project expectations - or even if a student goes above and beyond their personal level.  At this point there are no awards or certificates, just the honor of seeing their work there.  I am thinking about doing a picture of them with their art on the wall, but frankly I'm not sure I have the time.  I am at this school 3 days and those 3 days are PACKED!  Classes are pretty much back to back and there is little time for much else.  Perhaps I can get some parent volunteers to help me out with this?!

12.16.2011

Kirigami - Whole School

Picture It's the week before Winter break and I had planned to tap into the kids excitement of snow for this project - but since it seems that December is determined to act more like spring than winter there is no extra 'snow excitement'.  I decided to stick with the project anyhow, knowing the kids would love it even if it was raining outside and 50 degrees.

I started out the lesson with the word "Kirigami" on the board and asked students to raise their hand if they thought they might have an idea of what "Kirigami" meant.  I asked them if it sounded like another word we already know.  At this point a bunch of hands flew into the air.

Most times someone would mention cutting paper - or said that maybe Kirigami was like a paper snowflake.  I proceeded to explain that like origami, kirigami is a Japanese word and art form.  The word Kirigami roughly translates to "kiru" = to cut and "kami" = paper.  Kirigami is paper that is folded and then cut - revealing a symmetrical design.

Picture
For the younger kids, k-2, we learned what symmetrical was and then 2-5th learned that sometimes  there can be more than one line of symmetry.  I proceeded to draw some basic shapes on the board and asked students to show me on their fingers how many lines of symmetry an equilateral triangle would have.  I then waited for all hands to show me a number before I had a student come up and draw a line of symmetry.  We repeated this with a square as well.  Students really got into trying to figure out how many ways you could divide a shape in half while still having it be the same on both sides! 

I transferred this idea back to their kirigami, by explaining that their kirigami would most likely have 2 or 4 lines of symmetry depending on how they cut it. 

Next we passed out square pieces of paper, folded the first one together, drew on shapes, cut out - and then the students had the rest of class to make as many snowflakes as they wanted.  I had the Kinders and 1st graders fold their paper into a mountain and then fold their mountain in half.  The 2-5th grade students did the same as the younger kids but then folded it one more time in half. 

During this lesson students learned and practiced:
1- Symmetry and lines of symmetry
2- cutting techniques
3- folding
4- visualization
5- problem solving
6- asking for help

For a few of the classes I drew "challenge" patterns on their papers -- they loved the challenge and their end snowflake!


12.08.2011

Whole School - Lines and Shapes for Snowflake Wrapping Paper

It's that time of year again - only two weeks before Winter vacation and students are excited!!  I decided last year to make wrapping paper with my students and it was a HIT!  Making wrapping paper taps into their excitement for the holidays without doing a "Christmas" project.

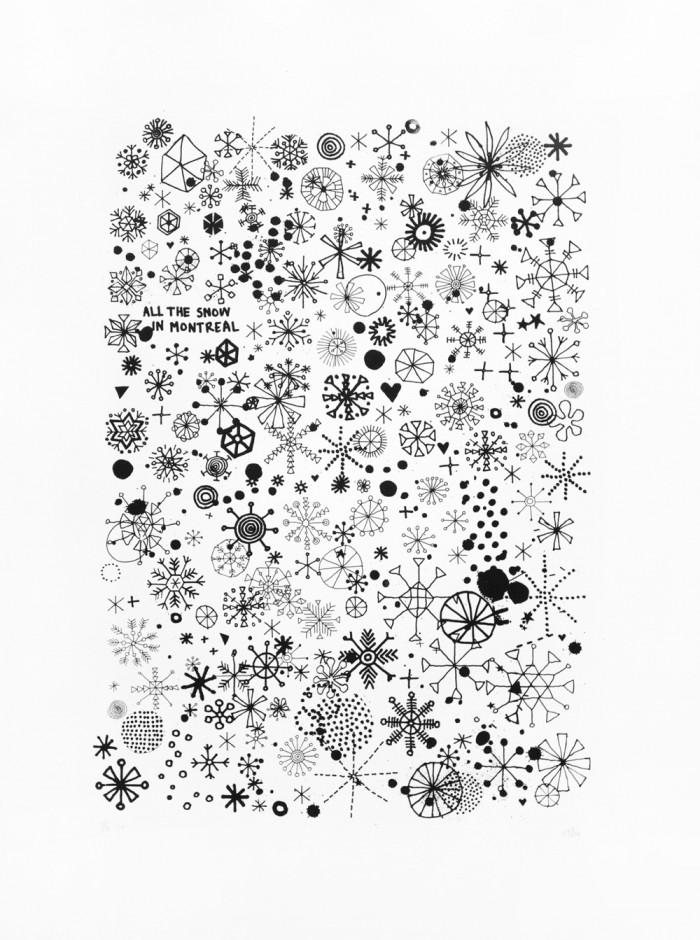
This year I thought about doing the same lessons as last year since I am in a new building - but a fellow Art teacher posted a picture by James Gulliver Hancock, "All the Snow in Montreal".  This picture was the perfect inspiration for our wrapping paper this year!


Students and I first made a few snowflakes are the board by them offering shapes for my base.(The 2nd Graders are studying symmetry in math after break - so I did a quick lesson about symmetry - what it is and how many lines of symmetry does each snowflake have?)

After a few snowflakes as a class they were ready for paper to make their own!

The rules were easy: no snowflakes could be the same!

I encouraged the older kids to think about colors and maybe keep a theme of colors or do all of them one color and then have one snowflake be a different color!

We rolled these up at the end of class with a chenille sticks and a note that says, "Please use my snowflake paper to wrap a gift this season".

Enjoy!


5.18.2011

Whole School - Light Graffiti 2011

There are two rotations left before the end of the year which means it's Light Graffiti Time!!!  Wahoo!  I covered my windows and doors with black paper, made sure all the flashlights were working, hooked up the camera to the TV and away we went!

Here is a sample of work - click here if you want to see more!

2nd Grade -- Two students

1st Grade - Two students

2nd Grade - three students

1st Grade -- two students

2nd Grade - two students
Kindergarten - two students
4th Grade - Two students
3rd Grade - Two students

2nd Grade -- two students