Pages

Showing posts with label Hot/Cold Colors. Show all posts

5.10.2012

Hot and Cold Castles - Kindergarten

I am not sure when or how this lesson came to mind -- we did these a few months back, when it was suppose to be winter.  

The kinders and I looked at pictures of all different kinds of castels.  Their job during the slideshow was to look for different shapes!  We then went through each slide together to find all the shapes we could: square windows, rectangle windows, triangle windows -- triangle roofs, prisms (from one student), circles, arches!  You name it, they saw it -- they saw it in the buildings and the trees surrounding.
The first day we drew our castles with pencils - making sure to use a castle top line and all the shapes we saw!  I drew a couple of example castles to help them see how the shapes went together - then I quickly erased them so that no one would be tempted to copy!  Once the students drew their castels they outlined them with black oil pastel.

I honestly can't remember if we painted these the same day we drew them or not..... wow how long ago did we do these?!

In any case, we discussed hot and cold colors at some point - the kids helped me sort colors with some guided help.  I asked for examples of things they would color orange or yellow.  I get answers that range from  chicken to fire to sun to shoes.  I do my best to stir them towards the sun and fire to help them remember what is hot.  I then ask them what do they color 'blue' -- water, sky, pools, rain.... in most cases kids associate these will a cool feeling.

So, with some examples and guided direction the kids and I sort colors.

I then pass out water colors that are all cool and they can choose to paint either their castel OR their sky.  The next class we use hot colors and paint what they didn't pain before.  (I do them different days and only give them what they can use to help enforce hot and cold groupings.  In Kindergarten we do hot/cold cityscapes in which I give them then whole palate of watercolors and its' their job to use the correct colors in correct groupings.)

Overall the kids had a BLAST drawing these and painting them in.  I even had one student insist on using neutral colors. Ha!

4.04.2011

2nd Grade - Abstract Sculptures

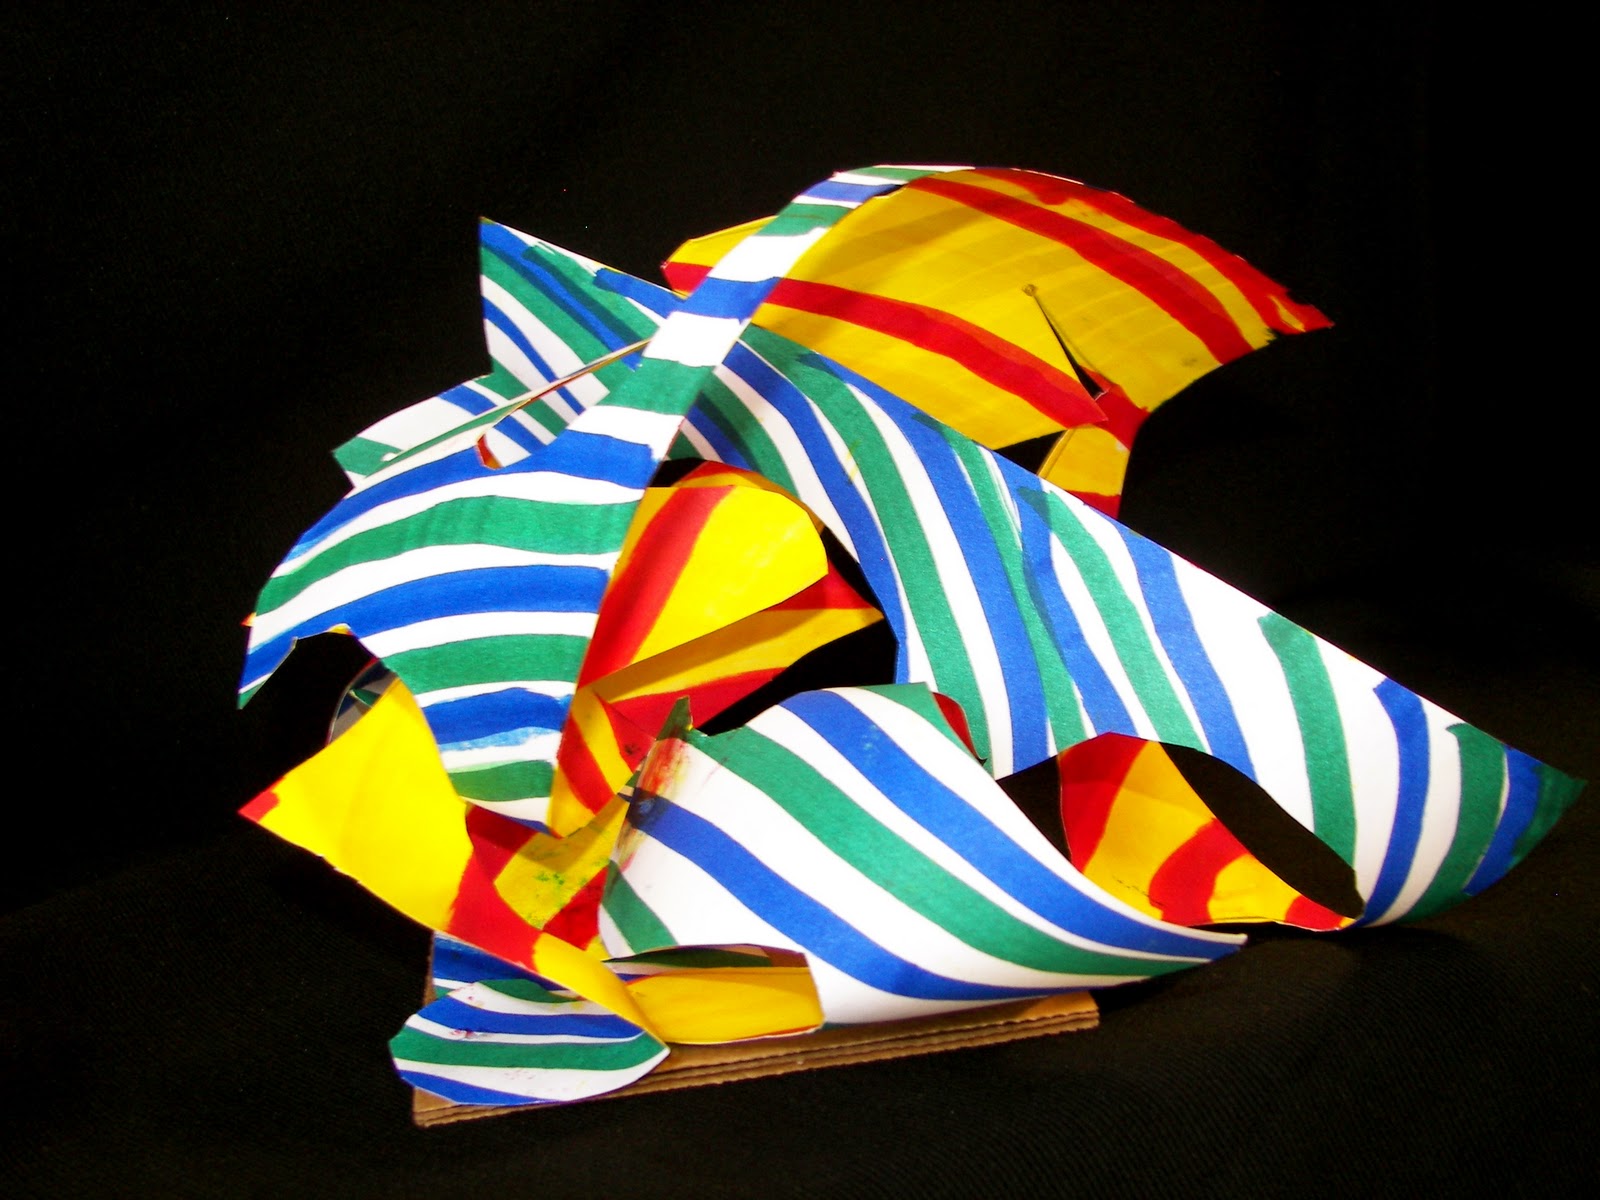
This lesson is a great experience in problem solving and creating in 3-D space.  I start out the lesson by showing a slide show of some past examples and asking the students to share what they observe.  They talk about the colors they see, the shapes they see, and sometimes the colors go in a pattern.  I explain that they will be making their own version of these sculptures, but that the first day or two of the project they will be prepping their paper before they can build. 
Their paper needs to have hot colors on one side and cold colors on the other.  I ask the students to observe the lines on the paper and if they are thick, thin, close together or far away -- they respond thick and close together.

Next I do a quick demonstration about how to use the markers to get thick lines (Mr. Sketch are the best but not needed).  I show them how to use the side of the marker tip instead of the top tip.  They can use lines, shapes, words - anything to fill the entire space with thick lines!

Once the students have covered both sides of their paper - one side with hot colors and one side with cold colors the students bring me their paper.  Based on my knowledge of the students ability I drew, with a pencil, a continuous line on their paper splitting up the area - they then pick normal scissors or fancy scissors to cut it out.  The line starts off the paper and ends on the inside with a dot - each line is different.

When the students are done cutting they have one long crazy line of paper that they then twist, fold, then glue their paper together to make a sculpture.  When I demonstrate I focus on not gluing the first solution - but to twist and move the paper to find the most interesting shape.  I show them if I glue all the pieces flat they aren't nearly as interesting as gluing the pieces to other pieces.  As I demonstrate I also turn the sculpture around to view it from all angles to make sure it's interesting from all sides.


After their sculptures are built they put their name on it as well as titling their work - they then bring it to me and I take a picture from the side they find most interesting.

2.07.2011

1st Grade Hot and Cold Color Cityscapes

The students and I started off this lesson by looking at different cities skylines - things they noticed: buildings, windows, doors, cars, lights, sky, squares, rectangles, each city looks different.

I showed students two different techniques to make their cities and off they went!  Each city is an unique as the students themselves - adding stores and places they have been like: toys'r'us, target, St. Lukes Hospital, Walmart.... ect.

After the students created their city, added all the necessary windows, doors, signs - they sharpie outlined their creations.

The next class students and I reviewed hot and cold colors - most of them mastered these groups of colors in kindergarten.  The students then chose if they wanted their sky hot or cold and then their buildings were opposite.  I had originally thought to have the sky hot colors like a sunset and the buildings cold - but a first grader asked if he could do his the other way around because the sky is really blue.  Thus, the choice to pick where your colors went as long as all the hot colors were together and all the cold colors together.


They are stunning!

1.21.2011

2nd Grade - Paper Sculptures

Abstract Paper sculptures with 2nd grades students:

Students Learn/Review
- Sculpture
- Abstract
- hot/cold colors
- problem solving
- patients

Students use markers to make basic shapes on both sides of their paper - hot on one side and cold on the other.  Next students trace those shapes over and over - almost touching the line before but not quite.  I tell the students to use the side of their marker instead of the tip - making the lines thicker and this part taking less time.  If students mess up - its okay, they are going to cut the paper anyway.

When the whole paper is filled with colors - the students either cut their own paper or I draw a line for them to cut.  The students need to cut a crazy line throughout their whole paper with out making and scraps.  (Most students opt for me drawing the line that they cut)

At this point students pick up different parts of their paper and glue them together or on their tag board.  The goal is to make an interesting sculpture from all sides.  I encourage the the students to bend, fold, twist, loop, and even cut their paper to make it even more interesting!


1.05.2011

2nd - Radial Sun Designs

I modified an old lesson of mine - 3rd grade Radial Sun Window Clings for the 2nd grade Original Works fundraiser.  Instead of doing these on plastic window clings the students followed the same basic steps, but on a piece of 8.5x11 piece of paper.

The students learned/practiced:

- Radial Design
-Concentric Circles
- Shape
-Pattern
-Line
-Hot and Cold Colors

Lesson:  Students were given different sized round objects to trace in the middle(ish) of their paper.  Once the students do 2-3 concentric circles they fill each layer with simple shapes.  Many students will do a pattern of shapes.  We discuss how the shapes have to go all the way around the circle to make it a radial design.

Once the student fills the circles in with shapes and does a row of shapes around the last circle they draw lines across the paper in the background.  The students and I talk about different types of lines and how far apart they might choose to make their lines - they will need to color it!  

After all the drawing is done students trace with a permanent marker. 

Now comes the fun part.  The students and I review hot and cold colors.  The hot colors belong in the sun, or concentric circles and the cold colors should be in the sky - or around the concentric circles.


When students are coloring we emphasize not seeing any white since white is not hot or cold, and how they should color in and around their shapes instead of over top!

This is one of my favorite projects.  All the students succeed, the colors are bright, and they are stunning when they are completed!


4.19.2008

Radial Sun Window Clings (3rd)


After a long snowy winter the students and I were itching for some sun, so we decided to try and lure the sun out from behind the clouds with some radial sun window clings.

Students Learned/Practiced
--Radial Patterns
--Warm/Cool colors
--Using permanent markers

I first explained what radial meant then they helped me design a sun with radial patterns. Next they traced the shape of their window cling on a piece of paper and designed their own radial sun.

The students then taped the window cling over their design and traced their patterns with a black sharpie. After outlining the students colored their suns keeping warm colors on the inside and cool colors for the background.

This assignment was successful for each and every student no matter their skill level. When they were completed I put them up in the art room windows until they went home with the students!