Pages

Showing posts with label Non-Traditional Art. Show all posts

8.08.2012

Summer In The City - Detroit

Even though, last summer, I was overwhelmed and stressed about finding a job, I felt a pull to do something in the community. I dreamed of finding a place that I could donate my time, make a difference, but still take vacation without issue, and to do this all during the week.  I wanted to have my cake and eat it too. 

Needless to say I didn't search for anything along those lines my first summer in Detroit - blame it on being lazy, stressed, or convinced there was nothing of the sort.

Fast forward a year. My second summer in Detroit and that nagging feeling returns - perhaps out of boredom, perhaps out of a need to be more... more.... more than just me?

In any case, I was surfing Detroit websites and somehow ( I can't seem to recreate how I got there) stumbled upon Summer In The City. It was everything I was looking for: volunteering during the weekdays, painting, planting, playing, and only a day to day commitment.

I immediately registered to be a volunteer. I realized as I was filling out the online registration that clearly this organization is geared at people younger than I (mostly high school). I like youth and figured why not- the website said they had volunteers as young as 40.

My first few days were..... different. Not bad, but different. Somehow I thought that it was going to be like a Disney movie. I was going to go the first day and be moved to tears about all the good I was doing. I think, without knowing it, I was expecting some kind of music montage.... None of this happened. Instead I was someone who showed up amongst many, many high schoolers. I did not volunteer with anyone I knew- so, me being the shy person I am at first, I only had a few introductions to main crew people and did as I was told.

Even though my first few days were a little lack-luster - I kept going. I don't know if this was out of boredom, or if I knew somewhere inside that I needed to be there - for me. (It also had to do with Ben and Liz - who pretty much called or texted me the first few days telling me where to go and introducing me to people.)

Fast forward, again, to this evening:
It has been a few weeks of volunteering at multiple paint sites around Detroit and I finally get it. I finally get why I kept going back, why I am growing to love Summer In The City.

Before Summer In The City
Currently, it is not for the friends (as I am still getting to know people and I am still pretty quiet)- it isn't for the amazing bright paint we use (which is pretty cheerful). I keep going back because I am learning about Detroit.

I am learning about a truer side of Detroit, a side the news doesn't show, a side the burned out buildings can't show. I am learning about a side of Detroit that only people willing to feel can understand.

During/After Summer In the City
I started Summer In The City very cautious of where I was going - afraid of the neighborhoods. I actually remember wondering what I would do if someone showed they were mad I was painting over their tag.....

Instead of being presented with hostile neighbors, as I somehow expected - I have had nothing but positive comments and interactions.

People drive by and honk and shout things like, "great work" "keep it up" "looks awesome" "thank you" "keep up the fight"..... It goes on.

People stop by and ask how to get involved or who we are. More than once in the last few weeks people have made on the spot cash donations, brought water or snacks.

I am learning about a side of Detroit that is hard to explain with words. The people in the neighborhoods are passionate about the city and want it to be beautiful and safe - these people are strongly passionate, but in a completely different way than I expected.

I keep returning to Summer In The City because it is bigger than me, it is bigger than the paint- it is a small step in helping people reclaim their city. The bright murals help people smile, which helps people have hope, which then leads people to care. I keep going to get over my fear and assumptions of the city- to meet people in the neighborhoods that I am changing.

Summer In The City is becoming more than a place to spend my extra summer time - it will be a place I will return to each summer for years to come.

Thank you Summer In The City for being awesome and welcoming me so earnestly and freely.

6.11.2012

Light Graffiti (Week Two) -- Whole School

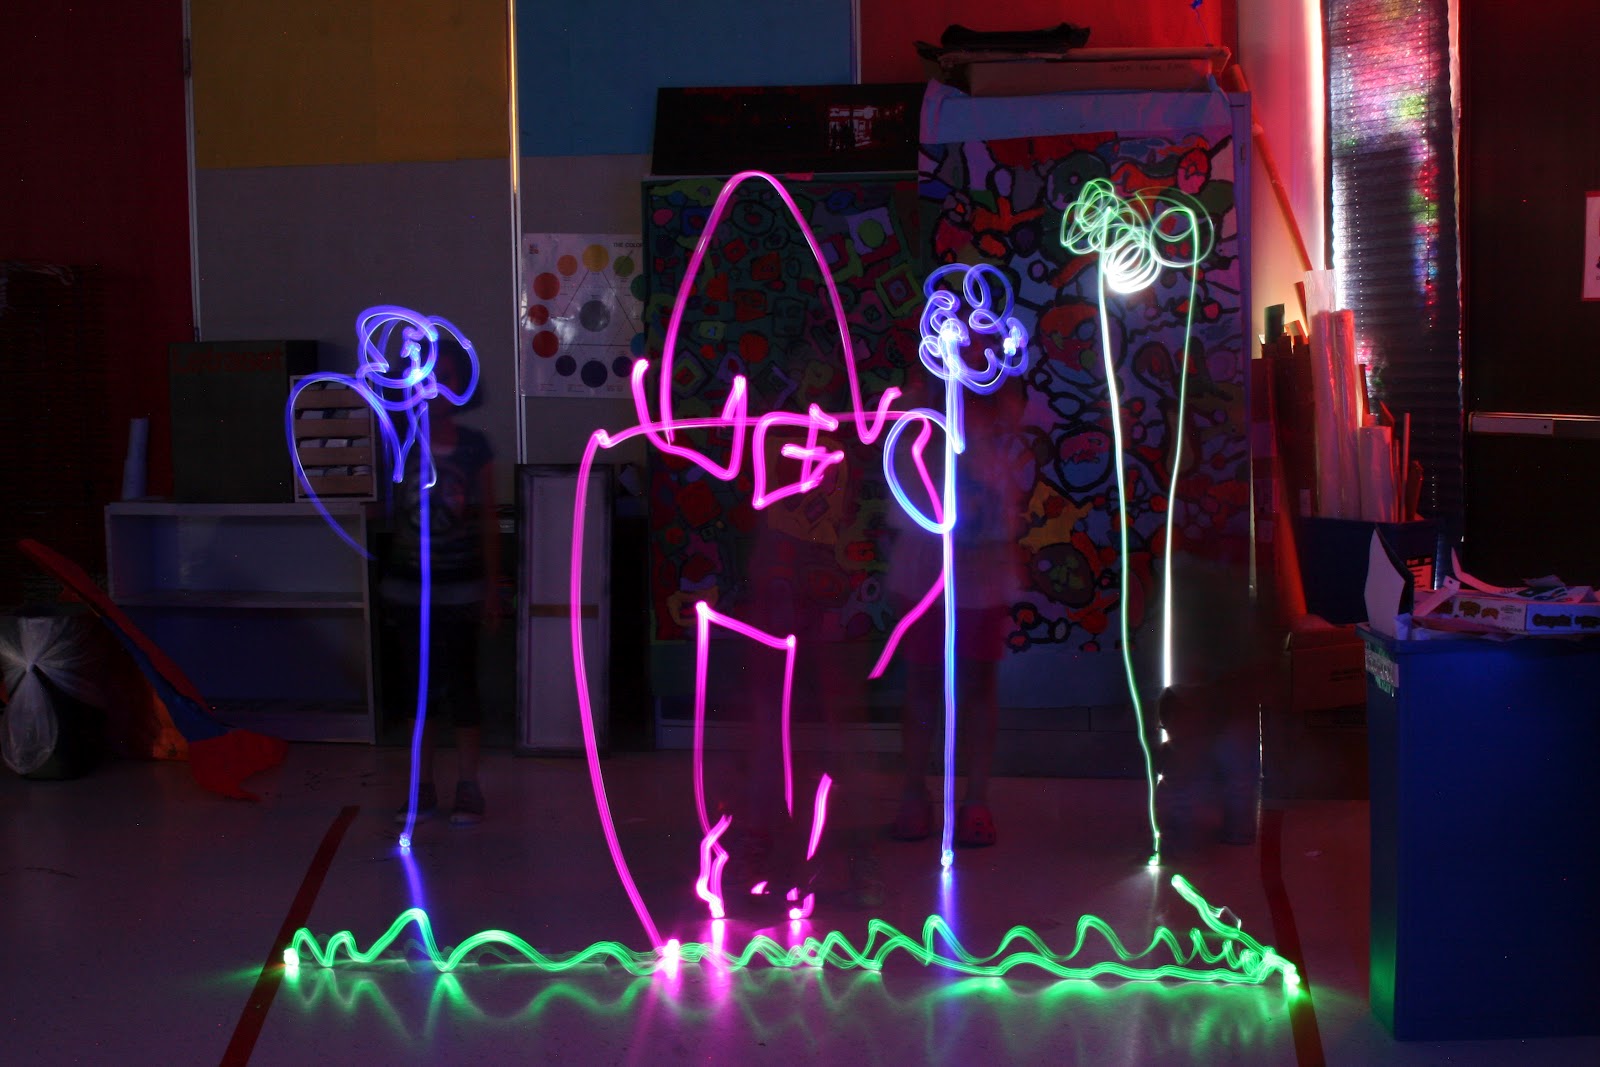
So, the second week of light graffiti is a less experimental and more deliberate.  Our goal the second week is to create recognizable pictures.  Students work in groups to create simple compositions based on a slip of paper they pull from a bucket -- it is harder than it seems.

So I do an example with a few volunteers from the class so that kids understand how it works.  I first ask my volunteers to each pull a strip of paper from a bucket.  In the bucket there are strips with words and a simple picture: grass, house, flower, tree, cloud, sun, and stars.  When we each have a strip of paper telling us what we are going to draw - we combine our images onto a piece of paper to make a picture.  I let each person draw their element on the paper and point out that no one is being bossy and telling people where to put each piece.


1st Try

2nd Try
Next  I show where to hand in the paper and return the slips.  Then I call my group to get their flashlights and get ready.

I help set up our picture by asking the class to help us figure out where to stand.  I ask them "Where should the grass be - front, back or middle?" - Most of the time they all agree with the front, but some classes need a little help figuring it out.  "Should the grass be drawn up in the air by my belly button?"  - No. "Where should the grass be?" -- On the floor.  "Okay, so now where should the flower go?" - Behind the grass.  "Where should the flower grow from?" - The grass/floor".  This process goes on till all our elements are in place.  Next, we take the picture.  When the picture is displayed on the projector we take a look and make adjustments to where we are standing, how fast we need to draw, covering our light when we are done, or perhaps getting a new light.  We then do a 2nd picture to try and improve.  Often times the 2nd picture is WAY better - though not always.  Below is a video of students doing their 2nd picture.


Next, the students break up into groups of about 5, pull their strips, draw their picture, hand in their picture and wait for their turn.  We go through the groups one at a time - making sure each group gets at least 2 pictures from the camera.

Most groups did a great job and exclaimed how much harder it was than they thought it would be.  


6.06.2012

Light Graffiti -- 2012 (week one)

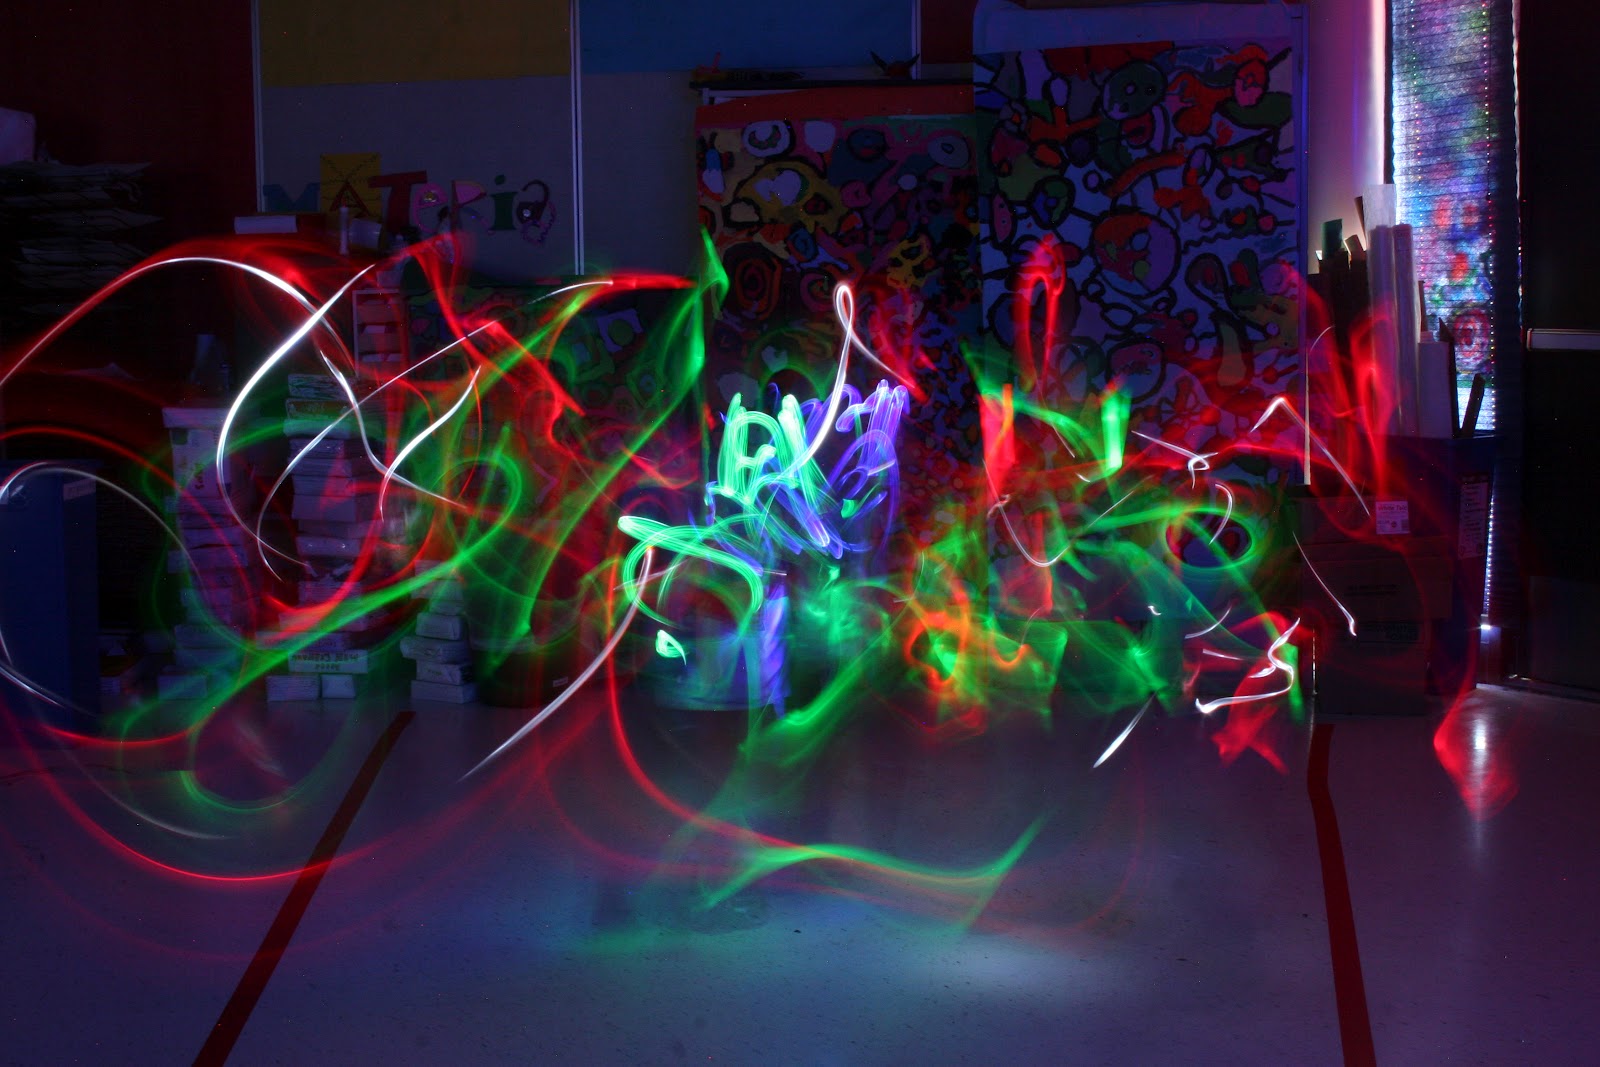
As always, light graffiti has been a HUGE hit with my students the last two weeks.


The first week I introduce Light Graffiti by asking the kids what they know about 'graffiti'.  Generally someone says that it is done with spray paint and that it is illegal.  I tell them that is true, but graffiti can be more than spray paint.  I explain that graffiti is making a permanent mark on a surface that you don't have permission to write on  - and yes it is illegal.  We briefly discuss that some art might look like graffiti but are really murals.  I explain that graffiti can be a mural when the artist is granted permission to do their art on a specific surface.


After discussing graffiti and murals I ask students why they think that LIGHT graffiti might be a popular alternative in the art community.  Some classes get it right away and other classes need a little push.  I will often emphasize the word LIGHT in my sentence again.  How do you think LIGHT graffiti would differ from normal graffiti and why might artists like the alternative?!  ::POP:: ::DING:: the hands shoot up all over the room.  Yes, yes, light won't make any permanent marks on the surface - so it isn't illegal!! 


Next we watch the following two videos that I found on youtube.  I explain that the first one is a commercial and that we will watch it twice -- once for fun and the second time to look for the people creating the light graffiti.  The second video is a tutorial that explains what we need to make our own light graffiti.

1st Video:

2nd Video:


After the videos the students tell me what we need for the day:  colored lights, camera, tripod, and setting settings.  (If there is time at the end of class I explain and show the students the shutter/shutter speed).


Next, I explain that I will call up two students at a time to pick out one or two colored flashlights.  When they are ready they will step inside of the polygon I taped on the floor (yes we really do talk about what a polygon is).  Then I will say "Ready, Set, Go" when I say go they can start moving around for their picture.  When their picture is over I will say something like, "Let's check it out" or "Lets see what it looks like".  The picture is then projected through our projector on the board!  I go on to explain that they will get another turn right away so stay where they are.  I want the students to go twice in a row because they learn SO MUCH from that first picture, that I want to give them a chance to try it again once they get the hang of it.  At this point I break and ask if there are questions - there are generally very few.


Then last, but not least, I ask the class if I have only two kids doing the light graffiti what is everyone else busy doing?!  "Watching" they all say.  I really stress that they need to ACTIVELY watch - as they will learn from each other.  It is safe to say that 99% of my students had never done this before and if they watch each other they get ideas and start to build off of other students movements.  It is really very fascinating.  

Again, I ask for questions - if none we get moving!

Here is a video of some kiddos making their first light graffiti:


Enjoy!  This is a blast at the end of the year!

5.18.2012

End of the Year Lessons -- Whole School

The end of the year is a tricky time to teach -- the kids are antsy, my patience is generally smaller, it's SO nice out, and the kids miss random classes due to field trips and other events.

I design my last month of classes to highly engaging lessons that lean towards 'fun' while still having an educational component.  This way if I miss a class because they are on a field trip - I don't have to go back and teach the lesson they missed.  I also don't have a stack of papers at the end of the year for a student that missed the last week of school.

4/5 Weeks before End:
Clean out projects.  I spend this time passing back everything that I can find.  This year students 'doodled with Jim Henson' - we talked about how truly awesome Jim Henson is and how he 'doodled' all of his puppets/muppets.  The students then spent time creating their own characters -- students actually loved this more than I expected.  They really got into sharing their creations with people around them.  While they were busy 'doodling' I pass back any and all projects that got stored, put on display, mixed up in other classes.
 
3/4 Weeks before the End:
Origami Paper Airplanes.  Students ask all year to make paper airplanes - so we spend a day devoted to making them.
The rules:
- 3 papers total
- Decorate papers (keeps the kids honest about who's plane is who's)
- Grounded when indoors.
We spend class making airplanes based on prior knowledge and instructions.  We clean up early and either fly them in the room or, better yet, outdoors.


3/2  Weeks before the end: Light Graffiti.  I black out all the windows with black paper, find a tripod, digital SLR, cables to hook up to the tv and lots of flashlights/light emitting objects.  The first time we do this - students just experiment.  My lesson and links are here.

2/1 Weeks before the End:
Light Graffiti again.  This time I have paper with simple objects on them and groups make pictures.  Read here.

If we have one more week left we play art games, clean the room, art videos - generally I have some options and let the kids vote on what they would like to do.  The last week of school I rarely see every class - so it's kind of a relax week.


1.17.2012

Black Book of Colors - 3rd Grade


I did a "Black Book of Colors" lesson a few years ago, and decided that my current group of 3rd graders could handle the whole concept/idea.

I started out the first day of the unit with the question, "Can people who are blind understand color?".  I had the students vote, with their heads down, to see what they thought.  In MOST of my classes it was an overwhelming thought that no a blind person couldn't understand understand colors.  A couple of students always said yes.  I then asked for volunteers to explain their thoughts.  As expected the kids that say no can't wrap their heads around how to explain a color without sight and the kids who think yes - say you just have to explain it enough.

As this point I change the question to "Can a person who is deaf able to understand music?"  Immediately I have students saying yes!  I ask how.  They immediately tell me that the person could watch people play instruments, or someone could sign the words, or read music.  At this point they are so close to opening up their way of thinking that you can feel it in the room.  Next, I ask how many of them have sat at a red light and they can feel the bass of a car 3 places back?!  Almost all of them raise their hand -- I ask them how they could hear a car so far away..... tick... tick.. HANDS SHOOT IN THE AIR.  There are gasps as students get it.  I call on someone and they say they could feel it.  So I summarize - if people who are deaf can understand music through sight and sound - how could someone who is blind understand colors?!

Slowly, so slowly the gears are turning as students start to transfer their new thoughts - and BAM.  Hands go up.

Now, instead of calling on someone I tell them we are going to do an experiment.   I explain that I am going to blindfold a volunteer, hand them an object and their job is to tell the class what color it is.

I am always surprised on how many students volunteer for this role.  I pick my first volunteer and blindfold them.  I stress that if they cheat by looking under the blindfold it won't really help our experiment.  I then stress to the class that they can't make a single comment because even if they don't mean anything by it, it might give the color away!

I hand my first blindfolded student an orange making sure I puncture the skin with my nail.  After a few seconds the student tells me it's an orange.  I of course then ask what is the color?!  The student generally giggles and says, 'orange'.  I ask the class if this is true and they say YES!

I repeat this with a variety of things: a piece of chocolate (making sure my volunteer has no food allergies), a banana, the sunlight, a smelly marker, a cup of water.

After this is over we re-vote on the original questions "Can people who are blind understand color?".  Most students switch over to 'yes' though there are always still a couple of 'no'.  Now, I explain to them that they are both right.  People who are blind can understand color through their other sense though we don't know if they understand it the same way we do.  (I don't normally like to have 'trick' questions but this time it seemed appropriate).

I then read the best book ever, the book that inspired the unit - "The Black Book of Colors".  This book is written from Thomas's point of view.  He describes different colors using his senses: taste, smell, feel,  and even sound.  The pages are black, type in white - the book is also complete with brail and the pictures are all meant to be touched as they are raised off the paper.  The pictures have no color.

Next, I explain that we are going to make our own black book of colors.  (Pause for excitement and whispers).  As a class we complete the paper I am about to hand out to them.  It is a simple paper, but the thoughts the students have to create are new and stretch their current ways of thinking.  I have found that this paper helps them organize their thoughts.

Their paper says:
COLOR:

SMELLS LIKE:
TASTES LIKE:
SOUNDS LIKE:
FEELS LIKE:

So to complete this together I have a student volunteer a color, then other students to volunteer a way to use smell, taste, sound, or feel.

Example:
COLOR: green

SMELLS LIKE: sweet spring.
TASTES LIKE: mushy, gross, peas.
SOUNDS LIKE: summer breezes through the trees.
FEELS LIKE: sharp, pokey grass

After we create the example I pass out the papers and they make up their own colors and examples.  I stress that each one should be different, because otherwise they pick the first one they come up with and describe it for rest of the paper.  I remind them they are describing a color and not 'grass'.  This is a little tough for some students and they need some extra examples.  When they answer these they draw a  SIMPLE thumbnail sketch for each one.

DAY 2:

Students finish their white brainstorming sheets, pick their favorite drawing and draw it BIG on 9x12 black construction paper.  Next, they trace their lines with good ol' school glue.  We talk a lot about making their lines too skinny or too thick -- getting them just right.  I tell them to hold the bottle like a pencil with one hand, tilt the point, put the point on the paper, and always PULL the glue bottle -- turn the paper if needed.

When their picture is on the drying rack they are to write what they drew in a FULL COMPLETE sentence on their white paper... "Green tastes like mushy, gross peas".

DAY 3:

I tell students that we are going to test their papers.  I pass out random pictures FACEDOWN to students.  I ask them to keep their eyes closed, flip over the papers and try and figure out the picture using their fingers.  When they think they know they are to raise their hands.  When most students raise their hands I have them look to see if they were right - flip them back over, shuffle the papers in the middle of their table and pick a new one!  I did this for about 3-4 rounds.

Next, students take WHITE colored pencils and write their sentence somewhere that makes sense on their paper and in a size of lettering that also makes sense.

I then had them pick out a piece of colored construction paper that goes with the color they chose to represent.

1.06.2012

This Week in Organized Chaos

The break was wonderful, and it's nice to be back.  This weeks was a week full of new beginnings in the art room - lots of painting, drawing, brainstorming, and critical thinking!
Picture
Kindergarten students were introduced to "printmaking" this week.  We broke the word down into "print" and "make".  The students agreed they know how to "make" things without a problem.  I then asked them about "print".  Students told me that they print things off the computer and they print with stamps.  We talked a little bit more about how both those things are used to create the same image over and over again!  I explained that is exactly what printmaking is - making the same print or picture over and over!

I did a quick demonstration on how to load the brayer with paint, roll it on pre-cut pieces of bubble warp, and 'print' the bubble wrap on their paper.  You would think I was performing magic the way they responded to the print!  I then explained a few more things including procedures for clean up and sent them off to their seats!

These turned out beautiful!  I have no idea what we are going to do with them, if anything.  I had originally thought to use them in a collage next class, but I am also thinking of leaving them the way they are.  I will have this all figured out by next class.
Picture


1st Graders learned about "profile portraits".  We started out by looking a short slideshow filled with examples of profile portraits.  I asked the students to raise their hand when they could tell me something ALL the pictures had in common.  The students then told me that all the people were facing off to the side.  So, next I asked how they knew they were facing sideways.  You could almost hear the gears turning in their heads with quizzical looks on their faces trying to figure out both how they knew that and how to explain it.  Sure enough, they needed a little help.  I asked them to show me on their fingers how many eyes they SEE.  I told them to count the eyes they SEE.  Most kids had one little finger up, a couple of two.  We then counted the eye together - sure enough there was one!  I asked them if the person was real and they turned to face the class how many eyes would they see? -- TWO!  an Ah-ha moment for sure.

We talked a little longer about profiles - I traced one of the faces on the board to show that the nose points off the face in the direction it is facing, along with only seeing half the mouth.  I had the students do some guided practice by drawing a series of pictures on the board and the students showed me on their fingers which one picture,out of three, had a correct profile.

There was a lot of excitement when the students learned their profile portrait was going on a tooth fairy!  I will post the whole lesson after the pictures are done!
Picture


2nd Graders are working on using visual texture in their artwork.

We started out by reading the book "Where the Wild Things Are".  I told the students that their job during the story was to pay close attention to the wild things!  At the end of the book I had the students share what they noticed - quickly they share that each wild thing is made up of different types of animals!  We then discussed how the scaly body looked bumpy, but the page didn't feel bumpy.  Ah-hah - visual texture!

This book was the inspiration for their own "Wild Thing" - more to come.
3rd Graders did some serious critical thinking this week.  As soon as they walked in I told them I was going to write a question on the board and I wanted them to think about it - not talk, but think.  They needed to decide yes or no as their current answer.

I wrote on the board, "Can people who are blind understand color?"

I asked them to think about if they had never, ever seen any type of color - could they understand that an orange was orange, or that the sky was blue, or their favorite color was green?

I let them mull it over, had them put down their heads and we took a quick poll.  In most of my classes it was overwhelming "No".  Students that wanted to share their reasons were allowed (well at least for a while - we only get 50 minutes!).  Next, I asked them if someone was deaf could they understand music?!  Students jumped all over using other sense to understand music - reading it, watching it, feeling it.  Slowly they started to connect that maybe if a deaf person could use other senses to understand music - maybe, just maybe someone who was blind could use other senses to understand colors.

Next, my favorite part, we conducted a little experiment.  I told students I would need a volunteer that would be willing to be blindfolded, then handed an object that they needed to report the color on.  It always amazes me how many kids want to try this infront of the class!  I do my best to pick equal numbers of boys and girls, though not everyone gets a chance.

The first students come up, I blindfold them. I ask them to make sure they can't see - it won't work if they can see!  Then I tell the class that the only way it will work is if the WHOLE class can stay quiet!  If someone blurts something out or makes a comment it might ruin the experiment.  Next, I hand my blindfolded student an orange.  Almost immediately they can tell me that it is an orange and it is the color orange.  I asked who they figured it out so quick -- they generally said the shape, texture, and the smell!  We continued this for a few rounds making the materials harder and harder to guess!

We then read an awesome story called "The Black Book of Colors" in which a child who is blind, Thomas, describes colors to us using his senses.  All the pictures are on black paper and have no color - but instead can by felt by the finger tips.  The story is also written in brail across the top of each page.

After the book I told students we were making our own "Black book of Colors".

The next steps proved to stretch the thinking of the third graders as they were asked to describes colors through - taste, smell, sound, and touch.

I will post more when we are further in the project!

Picture


4th Graders decorated paper for collages we will be starting!

This summer I was walking the streets at Royal Oak's "Arts Beats Eats" and found an artist that I was fascinated with.  I came home and found her website knowing I wanted to do a project inspired by her work.

Students used pre-picked color groups to make their papers.  I asked them to layer their paint and experiment with paint brushes, texture boards, toothbrushes, combs, and q-tips.  The results are BEAUTIFUL!


5th Graders are pumped out their project!  We first looked at a slideshow of Logos.  I had the students tally on their hands how many of the logos they knew - of course they knew them all!

I had a slide with a few different companies and how their logo has changed over the years - more simple and more unique at the same time thanks to computer graphics!

Next, I explained they were going to make their own logos, personal logos made out of their initials.  The 5th graders were PUMPED!  I originally did this lesson with 8th grade students, and these 5th graders blew my socks off with their ideas.

I passed out a brainstorming sheet that helped them create different forms of their letters, thus helping them create something completely original and personal.