Students use string and watered down tempera paint to make these wonderful symmetrical mono prints.
Students Learned/Practiced:
-Printmaking
-Mono-printing
-Using materials appropriately
-Symmetrical
-Composition
The students first put their names on two pieces of paper, put on a paint shirt, grabbed a magazine, and sat ready to go. On their tables I placed water down tempera paint on bucket lids; red, yellow, blue. I then put two pieces of yarn in each color (about 14 inches long).
Next, the students squeeze the extra paint out of a piece of yarn and place it on one of their pieces of paper - with one end of the string sticking out.
The students place the 2nd paper on top of the first (which has the string on it) and put a magazine on top. Slowly pull the string out. Peal the papers apart and repeat until finished.
Creating and teaching art requires a sense of humor and an understanding of organized chaos - as there is no way to create something original without spreading out supplies and getting a little messy.
4.05.2010
2.14.2010
Kindergarten Eric Carle Flowers
Students in my kindergarten class created their own papers to make flower collages like Eric Carle.
Students Learned/Practiced:
- about illustrator/writer Eric Carle
- how Eric Carle makes his papers
- using scissors
- composition
- gluing
- problem solving
We first read "Little Cloud" by Eric Carle. I talked with them about brush strokes and the different shapes he used to make his pictures. Next, we traveled to Carle's website and watched a quick slide show explaining how he makes his papers.
During my demonstration I have the students tell me what they remembered from the slide show. When my demonstration was over the kids put on paint shirts and made their own beautiful papers.
The next time the students came we read "The Tiny Seed" by Eric Carle. I then explained that we will make our own flower, like in The Tiny Seed, with the paper we made from last class. I do another quick demonstration to refresh their minds on using scissors and glue.
I turn them loose and watch the creating begin!
2nd Grade: Where the Wild Things Are
Students created their own Wild Things and then used chalk pastel to add color.
Students Learn/Practiced
- Observing artist illustrations
- Visual texture
- using chalk
- Imagination
- Composition
We first read the book, "Where the Wild Things Are". Their job while listening was to observe the 'wild things'. After the book we discussed what they noticed. The students help me create a 'wild thing' on the board - 5 or more animals, each animal part needed to be given a visual texture. After an exciting and silly animal creation I turned them loose to make their own.
The next class we used chalk pastel or colored pencils in a variety of colors to finish their wild things.
4th Grade Value Projects
Students were struggling with the idea of value. They had trouble remembering the difference between contrast and value, so we did a mini project to help concrete value.
Students Learned/Practiced:
- Composition
- Color choice
- Value
- compass and ruler usage
I cut long strips of paper and gave students compasses and rulers. They were to draw circles that did not overlap and filled the space. Next, they used rulers to further break up the space. The students needed to be careful to not let their lines cross.
Next, I showed them how each section, between the straight lines, was a 'color'. Then within that section each shape was a different version of that color.
A few students struggled with finding the sections and the shapes inside - but after some one on one instruction they were on their way!
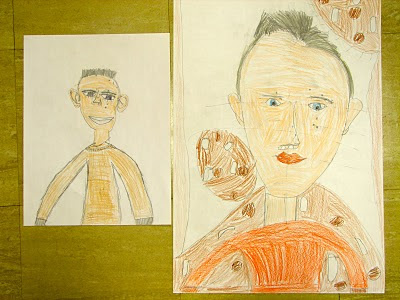
3rd Grade Self Portraits
It is part of our curriculim that each grade level do a self portrait.
Students Learned/Practiced:
- Proportions of a face
- Shapes and details of facial features
- Problem Solving
- How to handle frustration/asking for help
- Observation of colors/textures
For third graders, I choose to do a realistic self portrait. I first had them draw the best picture they could of themselves - a 'pretest' if you will. I looked at those and was impressed by what I saw. The only thing they really needed direction on was where to place their facial features!
Next time they came we observed ourselves in mirrors and looked at each other to figure out where our eyes really are on our head, along with our nose, mouth and ears.
The students took this new information and started a final composition.
Kindergarten Auction Items
The school I currently work at has a fancy dinner and auction for people of the community as a way to raise money for the district. The elementary art teachers were approached and asked to do a project of our choice with the students to auction off.
It took a while to come up with an idea that was easy enough for the students to do, but interesting enough that people would want to buy. I browsed around an online poster shop looking at their 'fine art'. I found "Man Find in Zahala" by Friedensreich Hundertwasser.
I decided that my kindergarten students could use this as a jumping spot and make their own version.
I projected Hundertwasser's picture on the whiteboard and asked the students to raise their hand when they could tell me a color or a shape. Together the students and I noticed the bright colors, the concentric circles, the green lines in the background......
So, I passed out rough drawn circles on paper and had the students cut them out. They then drew their own concentric circles with oil pastel, then water colored over top. When they were done they drew their own green line for the background of the board.
When everything was dry I glued their circles down and drew the black lines.
Next time the students came I showed them what they had created and had each student sign the back of the board.
Subscribe to:
Posts (Atom)