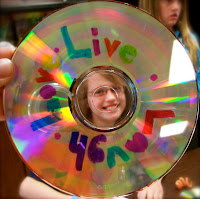
 Okay- so this have got to be my FAVORITE new project of the year.
 I saw someone post a picture on Pinterest from Artsonia where a CD was a rose window and then the Cathedral was drawn behind it. I was like "DUH!!!! What a PERFECT project for using CD's! How have I not thought of this? GENIUS!"
I have been waiting for what feels like months for clay to be over and such to try out this idea. I finally had the perfect moment to start this with a group of 5th graders!
I first spent about 45 minutes of planning the lesson trying to find an interesting/short/information video on Rose Windows to show my students.... man was that a task. I could find short boring videos, or interesting documentaries - but nothing that fit my whole criteria... well, that is until I found this:
Okay - so it isn't exactly perfect and I managed to talk over the part where the guy says "bloody hell" and then I skip the part about the commission for a new rose window. (I am okay with mentioning religion when it comes in context of art/architecture - but I didn't feel it was necessary to bring in the modern religious icons.)
 The thing I love about the video, other than the accents, is that it shows rose windows, a brief history, and even a few ruins.
 So, after the video (or before if I remember) I give a little history - set the scene for these mammoth buildings. I try to explain to the kids that these are not 'just stained glass windows' but that these are THE WINDOWS. It is hard to really explain a life to kids where there is no real visual stimulation - there were no billboards, signs, advertisements, ipads, tvs, photographs and such during the time when these were built. People were not use to seeing images at all let alone on such a GRAND scale. I then show some stills of these cathedrals and point out how little the people are, or the chairs on the inside. It is hard to describe how LARGE these structures are without a point of reference.
 After I get done talking at them (which I try not to do - but sometimes it is necessary), we discuss what they notice about the rose windows while looking at some still photographs. -- Round, symmetrical, colors, patterns go around the center.... etc. I then explain to them that they are going to create their own Rose Window.
They can either:
A) Start right away - but there is NO erasing sharpie so they will have to problem solve their mistakes.
B) Get a scrap sheet of paper and practice a few designs.
I hand out CD's and Sharpies and let them go.
The next time they come we look at a slide show of Gothic Cathedrals - complete with Rose Windows. After a few photos I put up the picture shown below with 6 Cathedrals side by side. I ask the students to look at them. Compare, contrast the different buildings. What do they have in common, how are they different? They discuss these things at their table, we share a few as a class -- 3 door sections, LOTS of arches, steeples (though not always symmetrical), rose window in the middle, 3 layers (doors, middle, steeple), recessed doors.
Next, I pass out 'stone' colored construction paper with a handout containing pictures of the Cathedrals we just looked at. Students use these pictures to help them make their own Gothic structure. They draw with pencil, trace with Sharpie.
 Then, the last we do is some shading to give the Gothic structures some pizazz. I explain about the sun making shadows and how that helps us understand depth and shape. We discuss that depending on where our light source, the sun, is will determine where our shadows go. I show them how to take a black colored pencil and draw a shadow on the left or right side every line on their paper (excluding where their building and sky meet). (Some struggle with this idea more than others - but its all good).
 At this point if students want to be done - okay. If they want to go above and beyond I have them go in with a white oil pastel and do the same on the opposite side of each line and color the sky in with a sky color.
These are spectacular to look at! I love how each one looks completely different.
Amazing!


