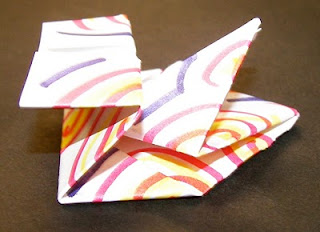
First we review what 'origami' means. I explain what we are going to make frogs that jump - some frogs will jump high, some long, some will do flips! Next, I go over expectations for the class period as it differs from most days. I will do a step at a time at the front of the room and they are to both watch and listen - I will do it twice. After I do it the second time they are to try it on their own. I will walk around and check and help students - but they are to try until I get to their table. I always ask, "Is it okay to be frustrated?" and they say "YES!" then I said, "Is it okay to give up?" and they say "NO!". This little exercise is always a good reminder when we start something that potentially will be frustrating for some students. After I check everyone I will count down from 5 - when I get done I expect the room quite and ready for the next step. I wait until the class is ready.
 |
| 1. Students decorate one side of index card with markers/crayons. |
 |
| 2. Flip Over. |
 | ||
| 3. Fold top corner to meet side. |
 |
| 4. Fold other top corner to meet colored corner. Should have smaller triangle and rectangle. |
 |
| 5. Unfold |
 |
| 6. Flip Over (should see color). |
 |
| 7. Fold horizontal line through middle of "X". Should have two rectangles. |
 |
| 8. Unfold |
 |
| 9. Flip Over. |
 |
| 10. Pull horizontal lines together. |
 |
| 11. Push met horizontal lines to table. |
 |
| 12. Push down opening - or push down the "hat". |
 |
| 13. Under the triangle should look like this. |
 |
| 14. Fold up edges of triangle to point. |
 |
| 15. Fold in the remaining sides to the middle. |
 |
| 16. Fold bottom up to the top. |
 |
| Another view of step 16. |
 |
| 17. Fold top layer back to line up with fold on the bottom. |
 |
| Another view of fold 17. |
 |
| Flip frog over - use finger to pull back..... |
 | |
| ..... let go and let the frog fly! |
Happy folding!

1 comment:
Thank you so much for these visual directions! Today is our origami day and I was searching for something easy-ish and fun. :) This is perfect!
Post a Comment